A professional solid wood worktop restoration in South Wales takes between 4 and 7 hours and transforms tired, scratched, greyed, or water-damaged worktops back to a like-new condition — all within a single working day. Here is exactly what happens, step by step, from the moment I arrive at your home to the moment I leave.
Transparency matters to me. Many tradespeople are vague about their process. I think you deserve to know precisely what you're paying for and why each stage matters.
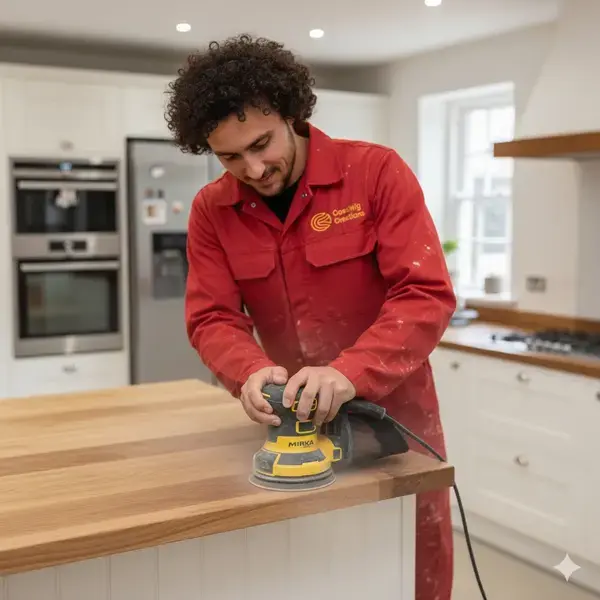
The Full Restoration Process — Step by Step
Initial Assessment
Before any equipment comes out, I walk around the worktops with you and assess the full extent of the damage. I note the wood species (oak, walnut, iroko, beech, and others all behave differently), the current finish (oil, lacquer, varnish, or bare wood), and any areas of particular concern — deep scratches, burn marks, water staining, or previous DIY oil applications that may need more work to remove. This assessment informs the sanding sequence and the finish specification.
Kitchen Protection
Before any sanding begins, I protect everything around the work area. Sinks are covered, hobs are protected, and adjacent surfaces are masked off. Cupboard doors beneath and around the worktops are covered. This stage takes only a few minutes but saves a great deal of cleaning time and ensures the rest of your kitchen is protected from any residual fine dust.
Coarse Sanding (Material Removal)
The first sanding pass uses a coarser grit to remove the old finish, surface-level scratches, stains, and grey oxidation. This is where the visual transformation begins — within a few minutes, the dull, damaged surface gives way to fresh, pale wood beneath. My dust-free sanding machine connects directly to a HEPA-filtered vacuum extractor, capturing virtually all dust at source so it never reaches the air in your kitchen. For deeper burns or gouges, I use specialist tools to work these areas before moving to the machine sander.
Progressive Grits — Refining the Surface
Sanding is never a one-pass process done properly. After the coarse grit opens up the wood, I progress through medium and fine grits, each one removing the scratch marks left by the previous. This step-by-step progression is what separates a professional result from a DIY one — cutting corners here leaves a visibly scratched surface under the oil. Typically I work through three or four grit levels depending on the starting condition of the wood.
Hand Sanding at Edges, Joints & Corners
Belt and orbital sanders cannot reach right into the joins between worktop sections, along upstand edges, or into cut-outs around sinks and hobs. These areas are sanded by hand using the same grit progression to ensure a consistent finish across the entire surface. A missed edge is immediately obvious once the oil goes on, so this stage cannot be skipped.
Grain Cleaning & Tack Off
Once all sanding is complete, any residual fine dust is removed from the wood grain using a tack cloth and a final vacuum pass. This is critical — any dust particles left in the grain will be trapped under the oil and will be visible in the finished surface as small blemishes. I take care here because it directly affects the quality of the final result.
First Coat of Osmo Polyx-Oil
I apply the first coat of Osmo Polyx-Oil with a short-pile roller or a flat brush, working with the grain. Osmo Polyx-Oil is a premium hardwax oil — it penetrates into the wood fibres rather than forming a film on top, which means it cannot peel, crack, or flake. It is food-safe once cured, water-resistant, and heat-resistant to everyday kitchen use. The first coat is applied thinly and evenly, then given time to penetrate and begin curing.
Light Denib and Second Coat
Once the first coat has begun to set, I lightly denib the surface with a fine abrasive pad to knock back any raised grain fibres, then apply the second coat. Two coats of Osmo Polyx-Oil give the wood optimal protection and a consistent, beautiful finish. Some very dry or highly porous worktops benefit from a third coat, which I'll advise you on at assessment.
Clean-Up and Final Inspection
All protection sheeting is removed, the kitchen is cleaned and left tidy, and I do a final walk-round with you to inspect the finished result. I explain aftercare — what to avoid for the first 24 hours, how to maintain the finish going forward, and what to do if you ever need to re-oil between professional restorations. I leave you a written aftercare card and am always available on WhatsApp if questions come up later.
The result: Your worktops look like new, your kitchen is clean, and the whole job is done in a single day. The Osmo Polyx-Oil finish is touch-dry within a few hours — you can use your kitchen for light tasks the same evening, and resume full normal use the following morning.
Why Professional Restoration Beats DIY
The difference between a professional restoration and a DIY sanding job comes down to three things: equipment, process, and finish quality.
Equipment: Proper dust-free sanding machines with HEPA extraction are expensive professional tools. Orbital sanders available from hardware stores do not have this capability, meaning the job will create a significant mess throughout the kitchen.
Process: Most DIY attempts use too coarse a grit, do not work through enough progressive grits, miss the edges and joints, or apply oil over an inadequately prepared surface. The result is visible scratch marks, patchy absorption, and a finish that fails within months.
Finish quality: Osmo Polyx-Oil applied correctly to a properly prepared surface will last 3–5 years with normal care before re-oiling is needed. An incorrectly applied finish may need redoing within a year.
Wood Species I Restore
I restore all solid wood worktop species commonly found in South Wales kitchens, including:
- Oak — by far the most common; responds beautifully to restoration
- Walnut — rich dark grain; requires care to preserve natural colour
- Iroko — African hardwood; very hard-wearing, excellent for busy kitchens
- Beech — pale, close grain; shows scratches readily but restores very well
- Bamboo — technically a grass but treated as a wood worktop; restorable
- Ash — distinctive grain pattern; restores to an exceptional finish
- Maple — hard, pale wood; requires a lighter touch during sanding
I do not restore laminate, composite, or engineered worktops — only solid wood. This focus means every job I take on is within my specialist expertise.
Specific Problems I Tackle
Burn Marks
Burn marks from hot pans are among the most common reasons people call me. Shallow burns — the black discolouration from a very brief contact — come out completely with sanding. Deeper burns that have charred the wood fibres can be significantly reduced or eliminated depending on depth. In cases where a burn is extremely deep, I can advise on options including grain-filling. In virtually all cases, the result after restoration is dramatically better than before.
Water Damage & Black Staining
Black water staining around sinks is caused by water penetrating through a failed finish and reacting with tannins in the wood. It looks severe but is nearly always removable. The sanding process removes the stained wood fibres, and a properly applied Osmo finish prevents recurrence as long as the worktop is maintained.
Scratches & Cut Marks
Surface scratches and cut marks from knives are removed during the sanding process. Very deep cuts — particularly those that run across the grain — may leave a faint ghost mark in certain lighting conditions, but these are exceptional cases. For the vast majority of scratched worktops, the result is a surface that shows no trace of previous damage.
Grey & Dull Oxidation
Wood that has not been oiled for years develops a grey, weathered appearance as the surface fibres dry out and oxidise. This is one of the easiest problems to resolve — the grey layer comes off in the first coarse pass, revealing the original colour beneath.
Getting a Quote
I quote based on the total number of worktops, their condition, and your location in South Wales. The easiest way to get an accurate quote is to WhatsApp me a few photos of your worktops along with your postcode — I can usually give you a price within a few hours.
Prices typically range from £550 for a small kitchen to £700–800 for a large kitchen with island. This compares to £3,000–5,000 or more for replacement worktops plus fitting costs. See my full cost guide for South Wales for a complete breakdown.
I cover all of South Wales from my base in Llanharry — including Cardiff, Swansea, Newport, Bridgend, Pontypridd, the Vale of Glamorgan, and beyond.
Frequently Asked Questions
How long does a professional worktop restoration take?
Most restorations are completed in a single day — typically 4 to 7 hours depending on the number of worktops and their condition. You'll have your kitchen back the same day.
Can I use my kitchen the same day?
For light use (e.g., making a cup of tea), yes — the Osmo Polyx-Oil is touch-dry within a few hours. For full normal use including placing items, chopping and getting the surface wet, I recommend waiting until the following morning to allow the oil to fully cure.
Is the sanding process dusty?
No. I use professional dust-free sanding equipment with integrated HEPA extraction that captures virtually all dust at source. Your kitchen and surrounding rooms remain clean throughout the job.
What finish do you use, and is it safe for food contact?
I use Osmo Polyx-Oil — a premium German-made hardwax oil. Once fully cured (24–48 hours), it is classified as food-safe (EN 71.3) and is suitable for surfaces that come into contact with food. It is also water and heat resistant to normal kitchen use.
Do you restore floors or other surfaces?
No — I specialise exclusively in solid wood kitchen worktops. This focus means I have deep expertise in worktop-specific issues (sink areas, heat damage, cutting board zones) that a generalist floor sander would not have.